
Water damage ranks among the costliest homeowner headaches, often going unnoticed until the repair bills pile up. A small drip behind drywall or under a slab can silently undermine structural integrity, fuel mold growth, and ruin insulation. Traditional leak detection meant pulling out panels, cutting access holes, or waiting for visible damage to appear. The Snoop leak detector changes that equation. This non-invasive acoustic tool listens for the telltale hiss of escaping water through walls, floors, and ceilings, helping homeowners pinpoint hidden leaks before they escalate into full-blown disasters. Whether you’re chasing down a mystery spike in your water bill or investigating a faint musty smell, understanding how Snoop works, and where to use it, can save thousands in remediation costs.
Table of Contents
ToggleKey Takeaways
- The Snoop leak detector uses acoustic listening technology to detect hidden water leaks behind walls, floors, and ceilings by picking up high-frequency sounds of pressurized water escaping through small breaches.
- Snoop’s non-invasive detection method eliminates the need for exploratory demolition, saving hundreds to thousands of dollars in repair labor and material costs while preserving original finishes.
- A Snoop leak detector costs $80–$250 and is highly affordable compared to thermal imaging cameras ($200–$2,000+) and whole-house flow monitors ($300–$800+), making professional-level leak detection accessible to homeowners.
- To use Snoop effectively, systematically move the metal probe across suspect areas in a grid pattern with headphones on, listening for hiss or whistle sounds that intensify near the leak source.
- The Snoop leak detector works best when combined with other tools like moisture meters and thermal imaging, allowing homeowners to locate the leak source early before water spreads and causes structural damage or mold growth.
- Early detection with Snoop can reduce water damage repair costs from $10,000–$15,000 (typical insurance claims) to just hundreds of dollars by catching slow drips before they soak insulation or rot framing.
What Is the Snoop Leak Detector and How Does It Work?
The Snoop leak detector is an acoustic listening device designed to detect water leaks concealed behind finished surfaces. Unlike moisture meters that only identify wetness after it spreads, or camera systems requiring access points, Snoop uses sound amplification to pick up the high-frequency noise generated by pressurized water escaping through cracks, pinholes, or worn pipe joints.
Here’s the basic science: when water under pressure (typical residential supply runs 40–80 psi) forces its way through even a tiny breach, it creates vibrations and turbulence audible in the ultrasonic range. Snoop’s sensitive microphone and amplifier isolate these frequencies from background noise, furnace hum, HVAC vibration, or traffic rumble, and convert them into tones a user can hear through headphones or a built-in speaker.
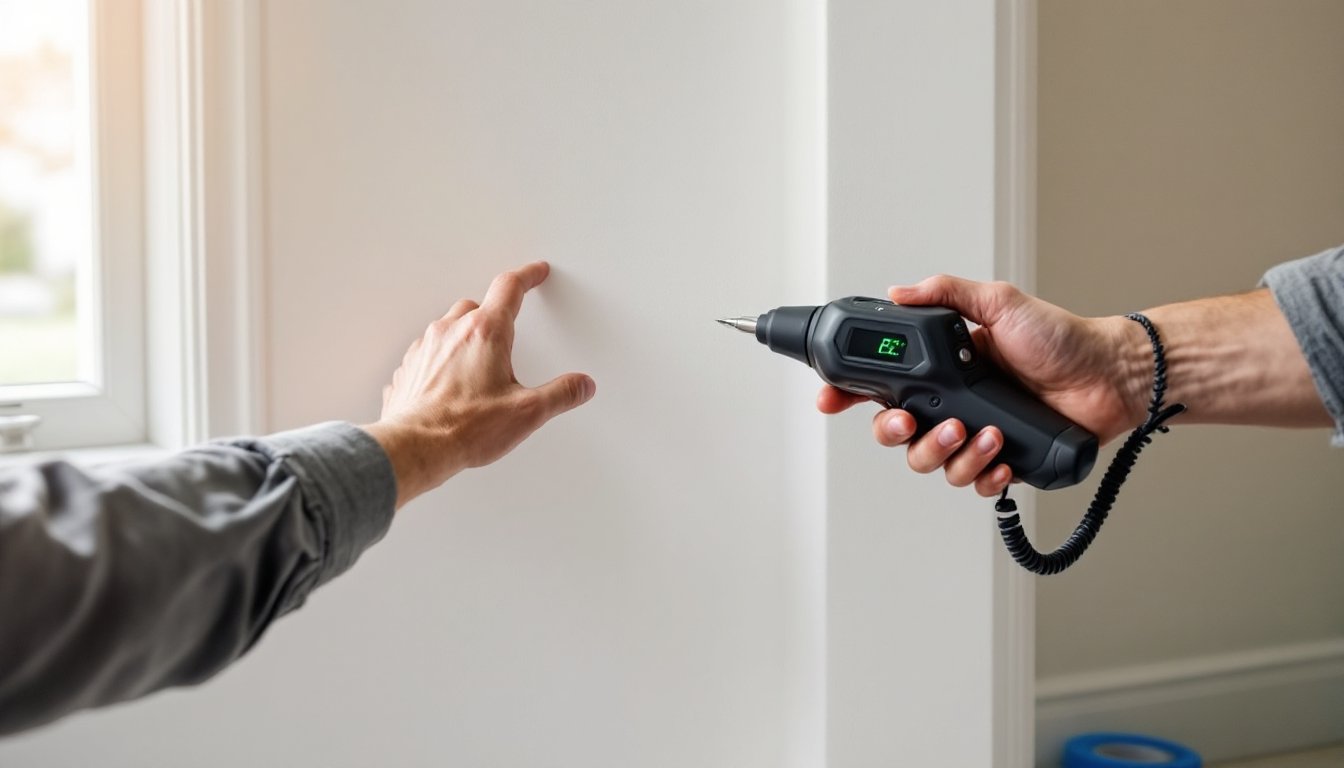
The device typically features a pointed metal probe (sometimes called a ground microphone or contact sensor) that you press against drywall, tile, concrete, or wood. The probe transmits vibrations through solid materials more efficiently than air, letting you trace a leak’s path along a supply line or drain stack. By moving the probe systematically across suspect areas and listening for intensity changes, you can often narrow a leak’s location to within a few inches.
Most Snoop models include volume control, frequency filtering, and visual LED indicators to help beginners distinguish between normal pipe flow and active leaks. Some newer units add Bluetooth connectivity, letting you record audio clips or adjust sensitivity via a smartphone app.
Key Features That Make Snoop Stand Out
Non-invasive detection: The biggest advantage is avoiding exploratory demolition. You don’t need to rip out drywall, pull up tile, or jackhammer concrete to confirm a leak. This alone can save hundreds in repair labor and materials.
Adjustable sensitivity: Quality Snoop units let you dial in gain settings to match your environment. High sensitivity works well in quiet basements or crawlspaces: lower settings help filter out ambient noise in mechanical rooms or near appliances.
Broad material compatibility: Snoop’s acoustic method works through wood framing, drywall, plaster, concrete slabs, tile, and even thin metal ductwork. It’s less effective through thick insulation or air gaps, but those scenarios are rare in finished living spaces.
Battery-powered portability: Most models run on standard AA or 9V batteries, making them easy to carry around a property without hunting for outlets. Expect 8–12 hours of continuous use per charge, more than enough for a whole-house sweep.
Headphone output: Isolating leak sounds from environmental noise is critical. Over-ear headphones block distractions and let you catch subtle frequency shifts as you move the probe along a wall or floor.
LED or meter feedback: Visual indicators help confirm what you’re hearing. When the probe passes over a leak, LEDs may light up or a needle may swing into a “hot” zone, giving you confidence even if you’re new to acoustic detection.
Frequency tuning: Advanced units let you focus on specific frequency bands. High-frequency settings (above 10 kHz) excel at pinhole leaks in copper or PEX: mid-range settings work better for larger cracks or joint failures in PVC or galvanized iron.
Where to Install Your Snoop Leak Detector for Maximum Protection
“Install” might be a slight misnomer, Snoop is a diagnostic tool you use intermittently, not a permanent sensor like a battery-powered water alarm. Still, knowing where to focus your searches saves time and catches problems early.
Behind bathroom fixtures: Toilets, vanities, and tub/shower enclosures are prime leak zones. Check the wall cavity behind the toilet tank, under the vanity kickplate, and along the shower pan perimeter. Pay special attention to areas where tile meets drywall or backer board.
Under kitchen sinks and dishwashers: Supply lines, drain traps, and dishwasher hose connections all fail eventually. Probe the floor and wall immediately behind these appliances, especially if you’ve noticed warped flooring or a musty smell.
Water heater compartments: The pressure-relief valve, inlet/outlet nipples, and tank seams can develop slow drips. Scan the floor around the base and the wall behind the unit. If the water heater sits in a closet or utility room, check adjoining walls for transmitted sound.
Laundry hookups: Washing machine hoses and valves are notorious for pinhole leaks. Probe the wall where supply lines penetrate, the floor drain area, and any cabinets or shelving adjacent to the hookups.
Slab foundations: If your home is built on a concrete slab, supply lines may run beneath or within the pour. Listen along baseboards, floor registers, and areas where you’ve noticed warm spots (a sign of a hot-water leak). Snoop’s ground microphone works well on bare slab or thin vinyl: carpeting and pad dampen transmission, so pull back flooring if possible.
Ceiling and wall cavities near plumbing stacks: Multi-story homes route drain and vent stacks vertically. Probe drywall near bathrooms on upper floors, especially around tub drains and toilet flanges. Leaks in these areas often migrate downward, causing stains on lower ceilings.
Outdoor hose bibs and irrigation lines: Though technically exterior, these connections can leak into wall cavities. Check the interior wall behind each hose bib and any rooms above buried irrigation manifolds.
Installing and Setting Up Your Snoop: A Step-by-Step Guide
Setting up a Snoop leak detector is straightforward, but proper technique makes the difference between a quick find and a frustrating search. Follow these steps for best results:
1. Charge or install batteries: Confirm fresh batteries or a full charge before you start. A dying power source can mimic intermittent signals and waste your time.
2. Attach headphones: Plug in over-ear or in-ear headphones. Closed-back models block ambient noise better than earbuds. Turn the volume to mid-range initially: you’ll adjust as you go.
3. Turn off water-using appliances: Shut off toilets (turn the supply valve or tape the float), dishwashers, washing machines, and any automatic ice makers. You want the system pressurized but quiet. Leave the main supply on so leaks remain active.
4. Silence the house: Ask family members to pause TVs, music, and HVAC fans. The quieter your environment, the easier it is to isolate leak frequencies. For homes with unavoidable background noise, use lower sensitivity settings or wait until evening.
5. Set sensitivity and frequency: Start with medium sensitivity and a mid-to-high frequency filter (if your model offers it). You can fine-tune once you hear baseline pipe noise.
6. Press the probe firmly to the surface: Place the metal tip perpendicular to the wall, floor, or ceiling. Apply steady, moderate pressure, enough to ensure good contact without flexing drywall or tile. Avoid angled pressure, which reduces sound transmission.
7. Move systematically in a grid pattern: Work in overlapping passes, moving the probe 6–12 inches at a time. Listen for changes in pitch, volume, or tone. A leak typically sounds like a hiss, whoosh, or high-pitched whistle that intensifies as you approach the source.
8. Mark hot spots: Use painter’s tape or a pencil to flag areas where the sound peaks. Cross-check by approaching from different angles. If multiple probe positions converge on the same spot, you’ve likely found your leak.
9. Verify with a moisture meter: Once you’ve identified a suspect area, confirm moisture presence with a pin-type or pinless moisture meter. This two-step verification process reduces false positives from normal pipe flow or HVAC condensation.
10. Document findings: Take photos of meter readings, tape marks, and any visible staining. If you’re hiring a plumber, these records help them plan the repair and avoid unnecessary exploratory cuts.
Safety note: Wear safety glasses if you’re working in crawlspaces or attics where insulation or debris might fall. Gloves protect against sharp edges on metal studs or staples.
How Snoop Compares to Other Water Leak Detection Systems
Homeowners have several leak-detection options. Here’s how Snoop stacks up:
Snoop (acoustic) vs. moisture meters: Moisture meters detect wetness after it spreads into wood, drywall, or insulation. They’re excellent for confirming damage but can’t locate the leak source if water has traveled along a joist or stud cavity. Snoop finds the breach itself, even if surrounding materials are still dry. Use both tools together for best results.
Snoop vs. thermal imaging cameras: Infrared cameras spot temperature differentials caused by evaporating water or hot-water leaks. They’re fast and cover large areas quickly but struggle with leaks hidden behind thick insulation or in conditioned spaces where temperature differences are minimal. Independent testing has shown that acoustic detectors like Snoop often outperform thermal imaging in slab and wall cavity scenarios.
Snoop vs. smart water sensors: Battery-powered alarms (like those placed under sinks or near water heaters) alert you when water contacts their probes. They’re cheap insurance against catastrophic flooding but only detect leaks that reach floor level. Snoop catches slow drips before they puddle, preventing long-term damage.
Snoop vs. whole-house flow monitors: Systems like Flo by Moen or Phyn Plus install on the main supply line and use AI to detect abnormal flow patterns. They’re superb for catching running toilets, dripping faucets, or pipe bursts, but they can’t pinpoint location. You still need an acoustic tool or plumber to find the breach. Snoop complements a flow monitor by narrowing the search once the monitor flags an issue.
Cost comparison: A quality Snoop unit runs $80–$250, depending on features. Moisture meters cost $30–$150: thermal cameras start around $200 for smartphone attachments and top $2,000 for pro models. Smart sensors cost $15–$50 each, and whole-house monitors run $300–$800 plus professional installation. Snoop sits in the affordable middle, offering pro-level capability without recurring fees or complex setup.
Real-World Benefits: Why Homeowners Choose Snoop
Early detection saves money: Catching a pinhole leak in a supply line before it soaks insulation or rots framing can trim repair costs from thousands to hundreds. Insurance claims for water damage average $10,000–$15,000: many policies have high deductibles or exclude gradual leaks entirely.
Preserves finishes and fixtures: Avoiding exploratory demolition means you don’t have to retile a bathroom, repaint a wall, or replace custom cabinetry. Targeted repairs keep original materials intact and reduce project timelines.
Empowers DIY diagnosis: While you’ll likely hire a licensed plumber for the actual repair (especially if it involves cutting into walls or breaking a slab), doing your own leak search gives you leverage. You can get more accurate quotes, avoid paying for diagnostic time, and ensure the plumber focuses on the right area.
Monitors problem areas over time: If you’ve had a previous leak repaired, Snoop lets you periodically check the same zone to confirm the fix is holding. This is especially valuable in older homes with galvanized or polybutylene plumbing known for repeat failures.
Non-technical operation: You don’t need HVAC or plumbing trade experience to use Snoop effectively. The learning curve is short, most users get the hang of probe technique and sound interpretation within an hour. Reviewers consistently note that even first-time users successfully locate leaks on their initial attempt.
Versatility beyond leaks: Acoustic listening devices also help trace hidden plumbing runs when planning a remodel, confirm proper flow in radiant heating loops, or diagnose noisy pipes (water hammer, loose brackets). The tool’s utility extends beyond emergency leak hunts.
Conclusion
The Snoop leak detector brings pro-level diagnostic power to the DIY toolkit without the expense or complexity of infrared cameras or whole-house monitors. By listening through walls and floors for the acoustic signature of escaping water, it pinpoints leaks before they cause visible damage, saving repair costs, preserving finishes, and giving homeowners the information they need to hire plumbers with confidence. Whether you’re troubleshooting a spike in your water bill or investigating a musty smell, adding Snoop to your arsenal makes hidden leaks a lot less mysterious.