Glass tiles bring a reflective, clean aesthetic to kitchens that few other materials can match. They’re durable, easy to clean, and available in styles ranging from classic subway to intricate mosaics. Whether someone’s tackling a full kitchen remodel or just refreshing the space between the countertop and cabinets, glass backsplash tile for kitchen projects offers a DIY-friendly option with professional-looking results. This guide walks through choosing, installing, and maintaining glass tiles for kitchen backsplash applications, with honest talk about costs, challenges, and the tools needed to get it right.
Table of Contents
ToggleKey Takeaways
- Glass kitchen backsplash tiles are stain and moisture-resistant, heat-rated for normal cooking conditions, and create a reflective surface that makes kitchens appear brighter and more spacious.
- Popular glass backsplash tile styles include subway tiles (fastest for DIY installation), mosaic sheets (more design flexibility), and linear tiles (ideal for modern aesthetics), each with different installation timelines and grout requirements.
- Proper surface preparation and white polymer-modified thinset are critical for glass tiles since they telegraph wall imperfections, and unsanded grout must be used to avoid scratching the glass surface.
- A typical 30-square-foot DIY glass backsplash project costs $600–$1,000 in materials and tools, with tile prices ranging from $8–$80+ per square foot depending on style and finish.
- Daily cleaning requires only a damp microfiber cloth or vinegar-water spray, while grout sealing should be reapplied every 12–18 months and individual damaged tiles can be replaced without removing the entire backsplash.
Why Glass Tiles Are Perfect for Kitchen Backsplashes
Glass tiles resist stains, moisture, and heat better than many traditional materials. Unlike porous ceramic or natural stone, glass doesn’t absorb grease or food splatter, which makes cleanup straightforward with just a spray bottle and microfiber cloth.
Heat resistance is another practical advantage. Glass tiles won’t discolor or crack behind cooktops under normal cooking conditions, though it’s still smart to maintain a few inches of clearance from open flame burners. They’re rated to handle typical kitchen temperatures without issue.
The reflective quality of glass opens up smaller kitchens visually. Light bounces off the surface, making spaces feel brighter and more open, especially valuable in kitchens with limited natural light or darker cabinetry. Designers often use glass tiles in compact kitchens to maximize the sense of space without structural changes.
From an installation standpoint, glass tiles are thinner and lighter than ceramic or porcelain, typically ranging from 1/8″ to 1/4″ thick. This makes them easier to cut with a wet saw and less demanding on wall substrates. Standard drywall with proper prep can support them without additional reinforcement in most cases.
One caution: glass shows every imperfection in the wall behind it. Any lumps, ridges, or dried adhesive will telegraph through, so surface prep and adhesive choice matter more than with opaque tile.
Popular Glass Tile Styles and Finishes
Glass backsplash for kitchen installations comes in several distinct formats, each with its own installation quirks and visual impact.
Subway tiles (typically 3″×6″) remain the most common format. They install in a running bond or stacked pattern and suit both traditional and contemporary kitchens. Beveled-edge subway tiles add dimension and hide slight layout variations better than flat tiles.
Mosaic sheets come pre-mounted on mesh backing, usually in 12″×12″ sections. Chip sizes range from 1/2″ squares up to 2″ hexagons or arabesques. The mesh backing speeds installation but requires careful adhesive application, too much squeezes through the gaps, too little causes tiles to release over time.
Linear glass tiles (sometimes called pencil or plank tiles) measure anywhere from 1″×4″ up to 2″×12″. They create strong horizontal or vertical lines and work well in modern kitchens. Installation requires precise spacing since any drift becomes obvious across a long run.
Finish options affect both appearance and maintenance:
- Clear/transparent glass shows the wall color and adhesive behind it. Use white thinset to keep the look clean.
- Frosted or matte glass hides minor substrate imperfections and shows fewer water spots.
- Iridescent or metallic finishes add shimmer but require consistent lighting to avoid a patchy appearance.
- Back-painted or coated glass provides solid color without showing the substrate. The coating must face away from the adhesive.
Subway vs. Mosaic Glass Tiles
Subway tiles install faster for DIYers since each piece is larger and easier to keep level. A 20-square-foot backsplash might take 4-6 hours with subway tiles versus 6-8 hours with mosaics, not counting prep and grouting.
Mosaics offer more design flexibility and work better around outlets, windows, or uneven runs. The smaller scale means fewer cuts and less waste on complex layouts. But, mosaics have far more grout lines, plan on 50-100% more grout and sealing time compared to subway formats.
For a first-time glass tile project, subway tiles present fewer variables. Mosaics reward patience but forgive layout errors more gracefully since the eye doesn’t track individual small tiles as easily.
Choosing the Right Color and Pattern
Color selection impacts perceived kitchen size, cabinet visibility, and how much grout maintenance someone will tolerate.
Light colors (white, soft gray, pale blue, seafoam) reflect more light and make small kitchens feel larger. They show grout lines clearly, so grout color choice becomes critical, contrasting grout creates a grid effect, while matching grout blends the surface.
Bold colors (cobalt, emerald, charcoal) create focal points but can overpower cabinetry. These work best in kitchens with neutral cabinets and countertops. Grout should usually match or go slightly darker to avoid a distracting grid.
Pattern complexity should balance with the rest of the kitchen. If countertops have busy veining or cabinets feature ornate details, a simple subway or linear tile layout prevents visual overload. Creative glass backsplash configurations show how pattern density interacts with other kitchen elements.
Sample before committing. Purchase a few loose tiles or a single mosaic sheet and tape them to the wall in place. Live with it for a few days, observing how kitchen lighting (both natural and artificial) changes the appearance throughout the day. Morning light through an east window can make colors look completely different than evening under-cabinet LEDs.
One often-overlooked consideration: cabinet and appliance finish. Glossy glass tiles next to glossy cabinets can create too much reflection. Pairing matte-finish glass with glossy cabinets (or vice versa) adds textural contrast without clashing.
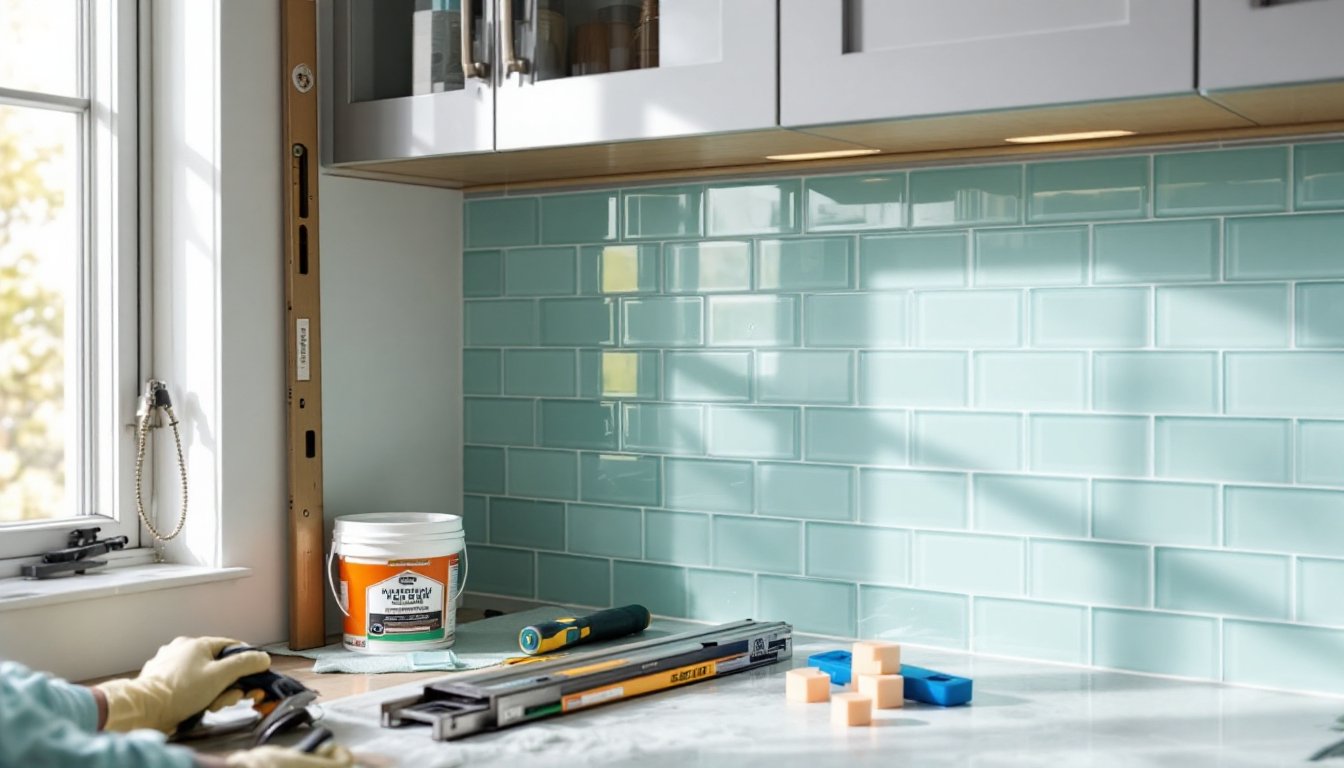
How to Install Glass Backsplash Tiles (DIY Steps)
Glass kitchen tile backsplash installation is within reach for DIYers with basic tile experience, but it’s less forgiving than ceramic. Here’s the process:
Materials needed:
- Glass tiles (order 10-15% extra for cuts and breakage)
- White polymer-modified thinset (gray thinset shows through transparent tiles)
- Unsanded grout (sanded grout scratches glass)
- Tile spacers (1/16″ or 1/8″ depending on desired grout lines)
- Painter’s tape
- Wet saw with a glass/tile blade
- Notched trowel (typically 1/4″ square-notch for glass)
- Grout float
- Sponges and buckets
Safety gear: Safety glasses, hearing protection, and dust mask for cutting: nitrile gloves for grouting.
Step 1: Prep the wall. Remove outlet covers and turn off power to those circuits. Fill any holes with joint compound and sand smooth, glass will show every bump. Wipe down with a damp cloth to remove dust. The wall should be clean, dry, and flat.
Step 2: Plan the layout. Measure and mark a level reference line using a 4-foot level. Most installers start from the centerline of the main wall section and work outward to keep cuts symmetrical. Dry-fit tiles along the countertop to see where cuts will fall, ideally, end cuts should be at least half a tile width.
Step 3: Mix thinset. Follow package directions for polymer-modified thinset. Mix to a peanut-butter consistency, too wet and it sags, too dry and it doesn’t bond. Let it slake for 10 minutes, then remix briefly.
Step 4: Apply adhesive. Spread thinset with a 1/4″ square-notch trowel, covering about 2-3 square feet at a time (work in small sections, thinset skins over quickly). Hold the trowel at a 45-degree angle to create consistent ridges.
Step 5: Set tiles. Press each tile firmly with a slight twisting motion. Use spacers between tiles to maintain consistent grout lines. Check level frequently, once thinset sets, tiles can’t be adjusted. For mosaic sheets, press the entire sheet evenly to avoid some chips sitting higher than others.
Step 6: Cut tiles as needed. A wet saw with a glass-specific blade makes the cleanest cuts. Score the cutting line on the tile surface with a marker. Feed the tile slowly through the saw, forcing it can chip edges. For outlet cutouts, multiple straight cuts to nibble out the opening work better than trying to notch corners in one pass.
Step 7: Let thinset cure. Wait at least 24 hours (longer in humid conditions) before grouting. The thinset should be firm and dry to the touch.
Step 8: Grout the joints. Use unsanded grout specifically, sanded varieties scratch glass. Mix grout to a thick paste. Hold the float at a 45-degree angle and sweep grout diagonally across tiles, forcing it into joints. Work in 4-5 square foot sections.
Step 9: Clean excess grout. After 15-20 minutes (when grout begins to firm), wipe tiles with a damp sponge in circular motions. Rinse the sponge frequently. A haze will remain, buff it off with a microfiber cloth once fully dry (1-2 hours).
Step 10: Seal (if needed). Glass itself doesn’t need sealing, but grout does. After grout cures fully (typically 72 hours), apply a grout sealer following manufacturer instructions. This step is optional for epoxy grout, which is naturally stain-resistant.
If someone’s never tiled before, glass isn’t the best starting material. Practice on a ceramic tile project first, the techniques transfer, but ceramic forgives mistakes that glass doesn’t.
Cost Breakdown: Glass Tile Backsplash on a Budget
Glass tile costs vary widely based on style, finish, and source. Here’s what to expect for a typical 30-square-foot backsplash (roughly 10 linear feet at standard counter height):
Tile costs:
- Budget glass tiles: $8-15 per square foot (basic subway or simple mosaics)
- Mid-range glass tiles: $15-30 per square foot (specialty shapes, iridescent finishes)
- High-end glass tiles: $30-80+ per square foot (hand-crafted, metallic, or designer lines)
For 30 sq ft with 10% overage, that’s 33 sq ft of material: $264-$2,640 depending on tile choice.
Additional materials:
- White thinset (50 lb bag): $25-35 (covers ~80-100 sq ft)
- Unsanded grout (10 lb bag): $15-25 (covers ~100 sq ft of small tiles)
- Grout sealer: $10-20
- Tile spacers: $5-10
- Miscellaneous (sponges, buckets, mixing paddle): $15-25
Materials total: $70-115 beyond the tile itself.
Tool costs (if not already owned):
- Wet saw rental: $50-75 per day
- Notched trowel: $8-15
- Grout float: $6-12
- 4-foot level: $20-40
Total DIY cost for mid-range tiles: $600-1,000.
Professional installation typically runs $8-15 per square foot for labor, adding $240-450 to the project. For complex patterns or difficult layouts (lots of outlets, windows, or uneven walls), expect the higher end.
Budget-stretching tips:
- Mix expensive accent tiles with affordable field tiles, a single row of designer glass with basic subway above and below cuts tile costs by 40-50%.
- Check tile outlet stores and clearance sections for discontinued colors.
- Reduce square footage by installing a shorter backsplash (4″ behind countertops only, full height behind the range).
- Mosaic sheets on mesh often cost less per square foot than individual large-format tiles, even though having more grout to seal.
One surprise expense: blade replacement. Glass is hard on saw blades. A quality diamond blade ($30-60) lasts through one or two average backsplashes. Cheap blades chip edges and need frequent replacement.
Cleaning and Maintenance Tips for Glass Tile Backsplashes
Daily maintenance is simple: wipe with a damp microfiber cloth or spray with a 50/50 vinegar-water solution. Glass doesn’t harbor bacteria or absorb stains, so routine cleaning prevents buildup without requiring harsh chemicals.
For stubborn grease: A few drops of dish soap in warm water cuts through cooking residue. Avoid abrasive scrubbers, use only soft cloths or non-scratch sponges. Steel wool or rough pads scratch glass permanently.
Water spots show easily on glass, especially in hard-water areas. Wipe down after cooking or splashing to prevent mineral deposits. If spots form, white vinegar or a commercial lime remover dissolves them.
Grout cleaning requires more effort than the glass itself. Unsanded grout is less porous than sanded but still needs periodic attention. For light staining, a paste of baking soda and water scrubbed with an old toothbrush works. For heavier staining, oxygen bleach (not chlorine bleach, which can discolor grout) lifts most marks.
Resealing grout: Reapply grout sealer every 12-18 months in high-use areas. Wipe sealer off glass immediately if it gets on tiles, dried sealer leaves a film that requires mineral spirits to remove.
Avoid ammonia-based cleaners on metallic or iridescent glass tiles. Ammonia can dull or discolor special finishes over time. Stick to pH-neutral cleaners for these surfaces.
Chip or crack repair: Individual glass tiles can be replaced if damaged. Use a grout saw to remove grout around the damaged tile, then carefully chisel out the tile. Clean the substrate, apply fresh thinset, and set a new tile. Match the grout color when re-grouting.
One common mistake: using too much cleaner. A light mist of solution is enough, excess liquid drips down and pools along the countertop, leaving streaks as it dries. Less is more with glass.