
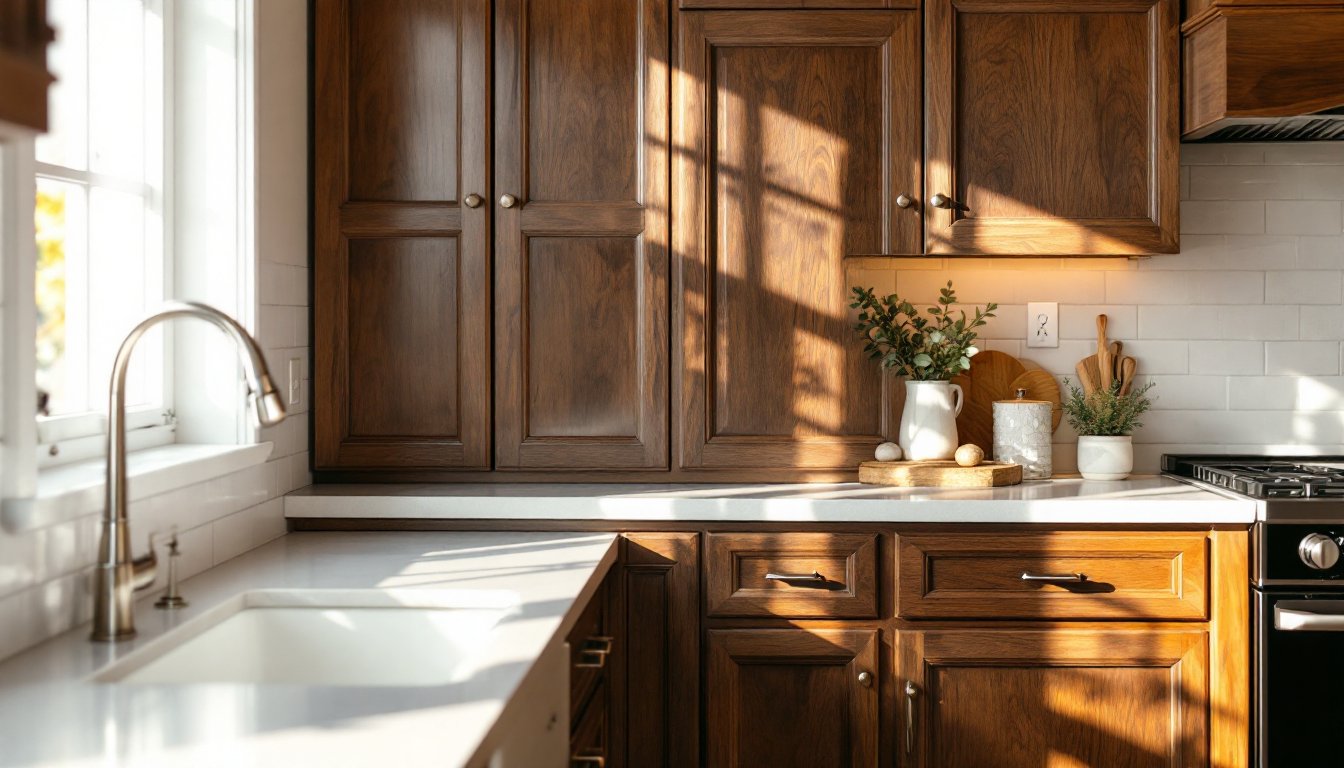
Stained kitchen cabinets reveal the natural grain and character of real wood in ways painted finishes simply can’t match. Whether it’s rich walnut, honey-toned oak, or sleek maple, staining showcases the beauty you’ve invested in while protecting the wood from daily wear. Unlike paint that sits on top, stain penetrates deep into the fibers, creating a durable, authentic finish that ages gracefully. For homeowners weighing refinishing options or planning a full kitchen overhaul, understanding the ins and outs of stained cabinets, from color selection to maintenance, makes the difference between a project that transforms a space and one that falls flat.
Table of Contents
ToggleKey Takeaways
- Stained kitchen cabinets penetrate wood fibers to showcase natural grain and character, aging more gracefully than painted finishes while resisting minor scratches better than opaque coatings.
- Stain works best on solid hardwoods like oak, maple, cherry, and walnut, whereas painted cabinets are the smarter choice for builder-grade pine or mixed materials that don’t accept stain evenly.
- Popular stain colors range from rich espresso and dark walnut for traditional kitchens to honey oak, weathered gray, and driftwood tones for modern and farmhouse styles, with results varying by wood species and light conditions.
- Proper preparation including sanding, wood conditioner application, and dust removal is essential to prevent blotchy stained kitchen cabinets, particularly on softwoods like pine and maple.
- The DIY staining process takes 2–3 weeks and requires multiple drying stages: stain application, topcoat sealing (at least three polyurethane coats), and 72-hour cure time before reassembly.
- Regular maintenance with mild soap, immediate spill cleanup, and topcoat reapplication every 5–7 years keeps stained cabinets protected and beautiful for decades.
What Are Stained Kitchen Cabinets?
Stained kitchen cabinets are wood cabinets treated with pigmented or dye-based stain to enhance or alter the natural wood color while allowing the grain pattern to remain visible. Unlike paint, which creates an opaque film over the wood surface, stain soaks into the wood fibers, highlighting texture, grain lines, and natural variations.
Most kitchen cabinet stains are oil-based or water-based formulas available in gel, liquid, or wiping stain forms. The stain itself doesn’t provide significant protection, that comes from the topcoat. After staining, cabinets receive a clear protective finish such as polyurethane, lacquer, or conversion varnish to seal the wood and resist moisture, grease, and scratches.
Wood stained kitchen cabinets work best on solid hardwoods like oak, maple, cherry, hickory, and walnut. These species have distinct grain patterns that stain enhances. You can also stain high-quality plywood or veneer cabinet boxes, though results vary based on wood quality and veneer thickness. MDF and other engineered materials don’t accept stain well because they lack natural grain structure.
The choice between stain and paint often comes down to the condition and species of the wood. If you’ve got beautiful hardwood with visible grain, staining preserves that investment. If the wood’s patchy, damaged, or made from mixed materials, paint offers better coverage.
Why Choose Stained Cabinets Over Painted?
Stained cabinets show off the wood’s natural beauty, something painted cabinets deliberately hide. If you’re working with quality hardwood like cherry or quarter-sawn oak, staining lets you display that character. The grain becomes a design feature rather than something covered up.
Durability is another factor. Stain penetrates the wood, so there’s no thick coating to chip or peel. Minor dings or scratches on stained cabinets are far less noticeable than on painted surfaces, where bare wood or primer shows through. Touch-ups on stained cabinets often involve a simple wipe with matching stain and a fresh topcoat spot application, whereas painted cabinets require sanding, priming, and matching paint batches.
Stained finishes also age more gracefully. Wood naturally darkens or develops patina over time, and stained cabinets embrace that aging process. Painted cabinets can yellow, especially with oil-based paints, or show wear at high-touch areas like handles and edges.
On the flip side, stain requires good underlying wood. You can’t stain over damaged, mismatched, or low-grade wood and expect great results. Painted cabinets hide flaws, fill grain, and create a uniform look regardless of wood quality. If your cabinets are builder-grade pine or mixed materials, paint is often the smarter choice. Stain also highlights wood inconsistencies, different boards absorb stain at different rates, which can lead to blotchy results without proper prep and wood conditioner.
Popular Stain Colors and Finishes for Kitchen Cabinets
Choosing the right stain color depends on your wood species, kitchen lighting, and design style. Different woods absorb stain differently, what looks warm and inviting on oak might appear muddy on maple.
Classic Dark Stains for Traditional Kitchens
Espresso, dark walnut, and jacobean stains deliver rich, dramatic tones perfect for traditional or transitional kitchens. Dark stains work especially well on oak and hickory, where the pronounced grain creates depth and contrast. Cherry also darkens beautifully with espresso tones, though it will continue to deepen naturally over time even without stain.
Dark-stained cabinets pair well with lighter countertops (marble, white quartz, or butcher block) and create a grounded, formal look. They also hide everyday wear better than lighter finishes. The downside: dark stains show dust, fingerprints, and water spots more readily, and they can make small kitchens feel closed-in without adequate lighting or contrasting elements.
Apply dark stains in thin, even coats. Heavy application doesn’t make the color richer, it just creates uneven absorption and prolongs dry time. A gel stain offers more control on vertical surfaces and reduces drips.
Natural and Light Stains for Modern Spaces
Natural, honey oak, golden pecan, and weathered gray stains suit contemporary, farmhouse, and Scandinavian kitchen styles. Light stains enhance wood grain without adding heavy color, making them ideal for maple, birch, and ash cabinets.
Natural and light stains keep kitchens feeling open and airy. They reflect more light than dark finishes and work well in smaller spaces. Weathered gray and driftwood tones, achieved with gray-tinted stains or vinegar-and-steel-wool solutions, are popular for modern farmhouse kitchens. These techniques, often highlighted in budget home makeovers, offer a reclaimed-wood look without the cost.
Light stains can be tricky on some woods. Maple’s tight, dense grain resists stain, leading to blotchy results. Always use a pre-stain wood conditioner on maple, pine, and other softwoods to ensure even absorption. Test your stain on scrap wood or an inconspicuous cabinet area, the same stain looks drastically different on oak versus maple.
Topcoat matters, too. A satin or matte polyurethane finish complements most stain colors without excessive shine. Semi-gloss works in high-moisture areas but can look too glossy for a natural wood aesthetic.
How to Stain Kitchen Cabinets: A Step-by-Step DIY Guide
Staining kitchen cabinets is a manageable DIY project if you’ve got patience, adequate workspace, and the right tools. This isn’t a weekend flip, plan on two to three weeks depending on the number of cabinets, drying time, and topcoat curing.
Materials and tools you’ll need:
- Wood stain (oil-based or water-based)
- Pre-stain wood conditioner
- Polyurethane, lacquer, or other clear topcoat
- 120-grit, 180-grit, and 220-grit sandpaper
- Tack cloth or microfiber rags
- Foam brushes, natural-bristle brushes, or lint-free rags
- Paint stripper or chemical stripper (if removing old finish)
- Putty knife and wood filler
- Painter’s tape and drop cloths
- Safety gear: nitrile gloves, respirator mask (for strippers and oil-based products), safety glasses, and adequate ventilation
Step 1: Remove cabinet doors and hardware. Label each door and drawer front with painter’s tape noting its location (e.g., “upper left,” “drawer 3”). Remove all hinges, handles, and knobs. Work in a well-ventilated garage, basement, or outdoors if weather permits.
Step 2: Strip or sand off the existing finish. If your cabinets have a thick polyurethane, varnish, or paint coating, stain won’t penetrate. Use a chemical paint stripper following manufacturer instructions, or sand down to bare wood. Start with 120-grit sandpaper, then progress to 180-grit. Sand with the grain, not across it. A detail sander or sanding sponge helps on profiled edges and trim.
Step 3: Clean and repair. Wipe down all surfaces with tack cloth to remove dust. Fill any dents, scratches, or holes with wood filler matched to your wood species. Let it dry completely, then sand smooth with 220-grit sandpaper.
Step 4: Apply pre-stain wood conditioner. This step is non-negotiable for softwoods and blotch-prone species like pine, maple, and cherry. Brush on conditioner evenly, wait 10-15 minutes, then wipe off excess. This evens out stain absorption and prevents splotchy results. Many refinishing tutorials emphasize this as the most commonly skipped step that leads to failures.
Step 5: Stain the wood. Stir your stain thoroughly, don’t shake it, as this creates bubbles. Apply stain with a foam brush, natural-bristle brush, or lint-free rag, working in the direction of the grain. Let it sit for 5-15 minutes (check the product label), then wipe off excess with a clean rag. The longer you leave stain on before wiping, the darker the result. Apply additional coats if you want deeper color, allowing each coat to dry fully (usually 4-6 hours for oil-based, 2-3 hours for water-based).
Step 6: Seal with a topcoat. Once the stain is fully dry (wait 24 hours to be safe), apply your protective topcoat. Polyurethane is the most common choice for kitchen cabinets due to its durability. Use a high-quality synthetic brush and apply thin, even coats. Sand lightly with 220-grit sandpaper between coats to remove any dust nibs or brush marks. Apply at least three coats for adequate protection. Each coat needs 4-6 hours to dry, and the final coat should cure for 72 hours before reinstalling hardware.
Step 7: Reassemble. Once the finish is fully cured, reattach hinges and hardware, then reinstall doors and drawer fronts using your labels as a guide. Check alignment and make adjustments as needed.
This process requires space and time. If you don’t have room to lay out all doors horizontally or can’t leave your kitchen unusable for weeks, consider hiring a professional refinisher or working in phases (uppers first, then lowers).
Maintaining and Caring for Stained Kitchen Cabinets
Stained cabinets need regular care to maintain their finish and protect the wood underneath. The topcoat does most of the heavy lifting, but daily habits matter.
Clean with mild soap and water. Use a damp microfiber cloth with a drop of dish soap to wipe down cabinet faces weekly. Avoid soaking the wood or letting water sit on the surface. Dry immediately with a clean towel. Grease buildup near the stove requires a bit more effort, use a degreasing cleaner designed for wood, but test it in an inconspicable spot first.
Avoid harsh chemicals. Ammonia-based cleaners, abrasive scrubs, and bleach can damage both the stain and topcoat. Skip the all-purpose sprays unless they’re labeled safe for wood finishes.
Address spills and splatters immediately. Tomato sauce, wine, and acidic foods can stain or etch the finish if left to sit. Wipe up messes as they happen.
Polish or wax occasionally. Every few months, apply a furniture polish or paste wax designed for wood cabinets. This adds a protective layer and restores luster. Avoid silicone-based polishes, which can cause issues if you ever need to refinish.
Watch for wear at high-touch areas. Handles, knobs, and cabinet edges near the sink take the most abuse. If the finish starts to look dull or worn, lightly sand the area with 220-grit sandpaper and apply a fresh coat of topcoat. Spot repairs are easier with stain than paint.
Reapply topcoat every 5-7 years. Even durable finishes wear down over time. If cabinets look dull, feel rough, or show water damage, it’s time to sand lightly and reapply polyurethane. You won’t need to re-stain unless the color has faded significantly (rare indoors) or you want a different tone.
Stained cabinets are an investment in both material and time. With proper care, they’ll outlast painted finishes and maintain their beauty for decades.